How To Cut Men’s Long Hair | Easy To Follow Layering Technique | Beginner Barber Haircut Tutorial
In this video we show you a simple, easy to follow technique for cutting men’s longer hair. Do you dread a longer haired client coming into the shop? Well if you do this technique could help. This layering technique is ideal for most longer haired clients, it helps you determine the ideal layer length for your customer and works well whether you leave the hair longer or cut it a little shorter. We use this haircut in the shop a lot and depending on the hair type you get a slightly different effect every time, but the result is always good. Many Barbers both experienced and beginner Barbers aren’t comfortable with longer styles, so hopefully this technique will help you the next time a customer with longer hair walks through the door.
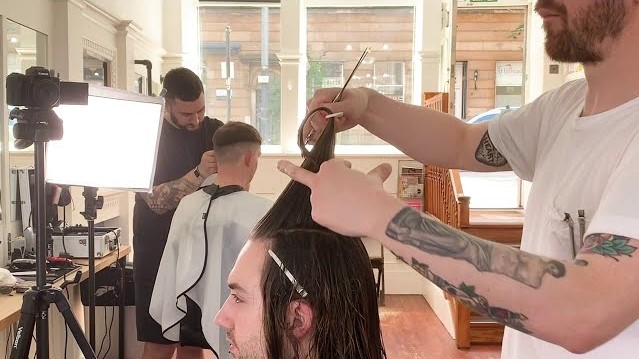
hello everyone Joseph from Rum Barber here and would you believe it this is my
first haircut tutorial on the channel I’m giving Paul the day off so please go
easy in the comments this is a tutorial I’ve wanted to do for a very long time
as it is one of my favorite techniques and is perfect for most longer length
haircuts we get asked a lot about how to cut longer hair so I wanted to show you
an easy method that you can use time and time again for good natural-looking
results and will stop you dreading those longer length haircuts when they walk in
the shop how long should the layers be that is one of the most difficult
decisions when cutting longer hair so we are going to begin with a simple
technique that helps you pick the perfect layer length for your customer
take a small section of hair from the middle of the front hairline pull it
down and choose the length you want the shortest layer at the front to be next
take another section of hair this time from the highest point of the head just
in front of the crown pull it straight up directly off the head over direct the
front section back to meet this vertical section holding the hair at the desired
length and where they meet cut a guide this will give you the starting point that
will determine the length of your layers
here is a guide to the terminology we are going to be using in this video we
are going to section the hair into six areas this will help guide us through
the haircut the first section will run from the top of the head down to behind
each ear next we will create a square section on top from each recession back
to our initial section line finally we will use a triangular section at the
crown this runs down to the occipital bone here are the sections on the
customers head our first section is taken about one fingers depth from behind
our initial guide line comb the hair directly up off the head find the small
section of hair that we cut as a guide and cut a square line to this length
make sure that you are pulling the hair directly up off the head as we have to
create a stationary point here that we can direct the rest of the hair to as we
work down through the triangular section of the crown we will be lifting each
section up to this stationary point and cutting a square line
after you have completed the triangular section we will then take sections out
to the line behind the ear again we will lift them up to the stationary point and
cut a square line
repeat this process on the other side of the crown area
next we move on to the top section begin by taking a section this time in front
of the guide that ran from ear to ear slightly incorporate a small amount of
hair from the first section you cut to use as a guide elevate the hair directly
up off the head and cut a square line
keep working in equal size sections going forward towards the front hairline
with each new section when you elevate the hair over directed back to the
stationary point of the crown
for each side begin by incorporating a little hair from the previous cut top
section as a guide working in sections down towards the ear elevate the hair
and cut a line that follows the over direction that you cut in the top section
now repeat this method on the other side
finally we are going to cut the baseline and determine the overall length of the
haircut to do this we are going to split the hair down the middle from the crown
to the nape next take a section at the occipital bone from the central line out
to the hairline this starting position will differ depending on the density of
the hair you are working on the thicker the hair the lower your first section
will be this customer has an undercut so we will be starting higher and I just
want to point out that this haircut we are doing will work whether there is an
undercut or not an undercut is not needed for this haircut starting in the
middle and with the customers head slightly tilted forward
cut the hair to the desired length I am using a razor as opposed to scissors as
I want to create a softer more natural edge to this haircut
cut a square line out to each edge and be careful not to round up at each side
keep repeating this process as you work up in parallel sections until you reach the top of the crown
for the sides make sure the hair on top is in its natural parting and take a
section that runs from around where you previously left off at the back to the
front hairline cut a square line that runs from the previously cut section at
the back through to the front use the handle of the razor to tap above
the ear as it allows for the protrusion and helps keep the line square
work up using this method until you reach the hairs natural parting
now repeat this on the other side
now the haircut is complete I am going to dry the hair into style using Daimon
Barber forming cream to help define and control the frizz I am going to loosely
twist the hair and dry with my fingers and a diffuser for a natural look
and this is the finished shape this haircut is so versatile and works well
on any length of longer hair we hope you found this tutorial useful and it makes
you more confident about tackling that next longer hair client that walks
through the door if you enjoyed this video please like it and share it with
other people who may find it useful as this really helps the channel if you
have any questions please leave them in the comments below and we will do our
best to answer them so thanks very much for watching and we’ll see you next time
